Wedding Reception | Invitations
/
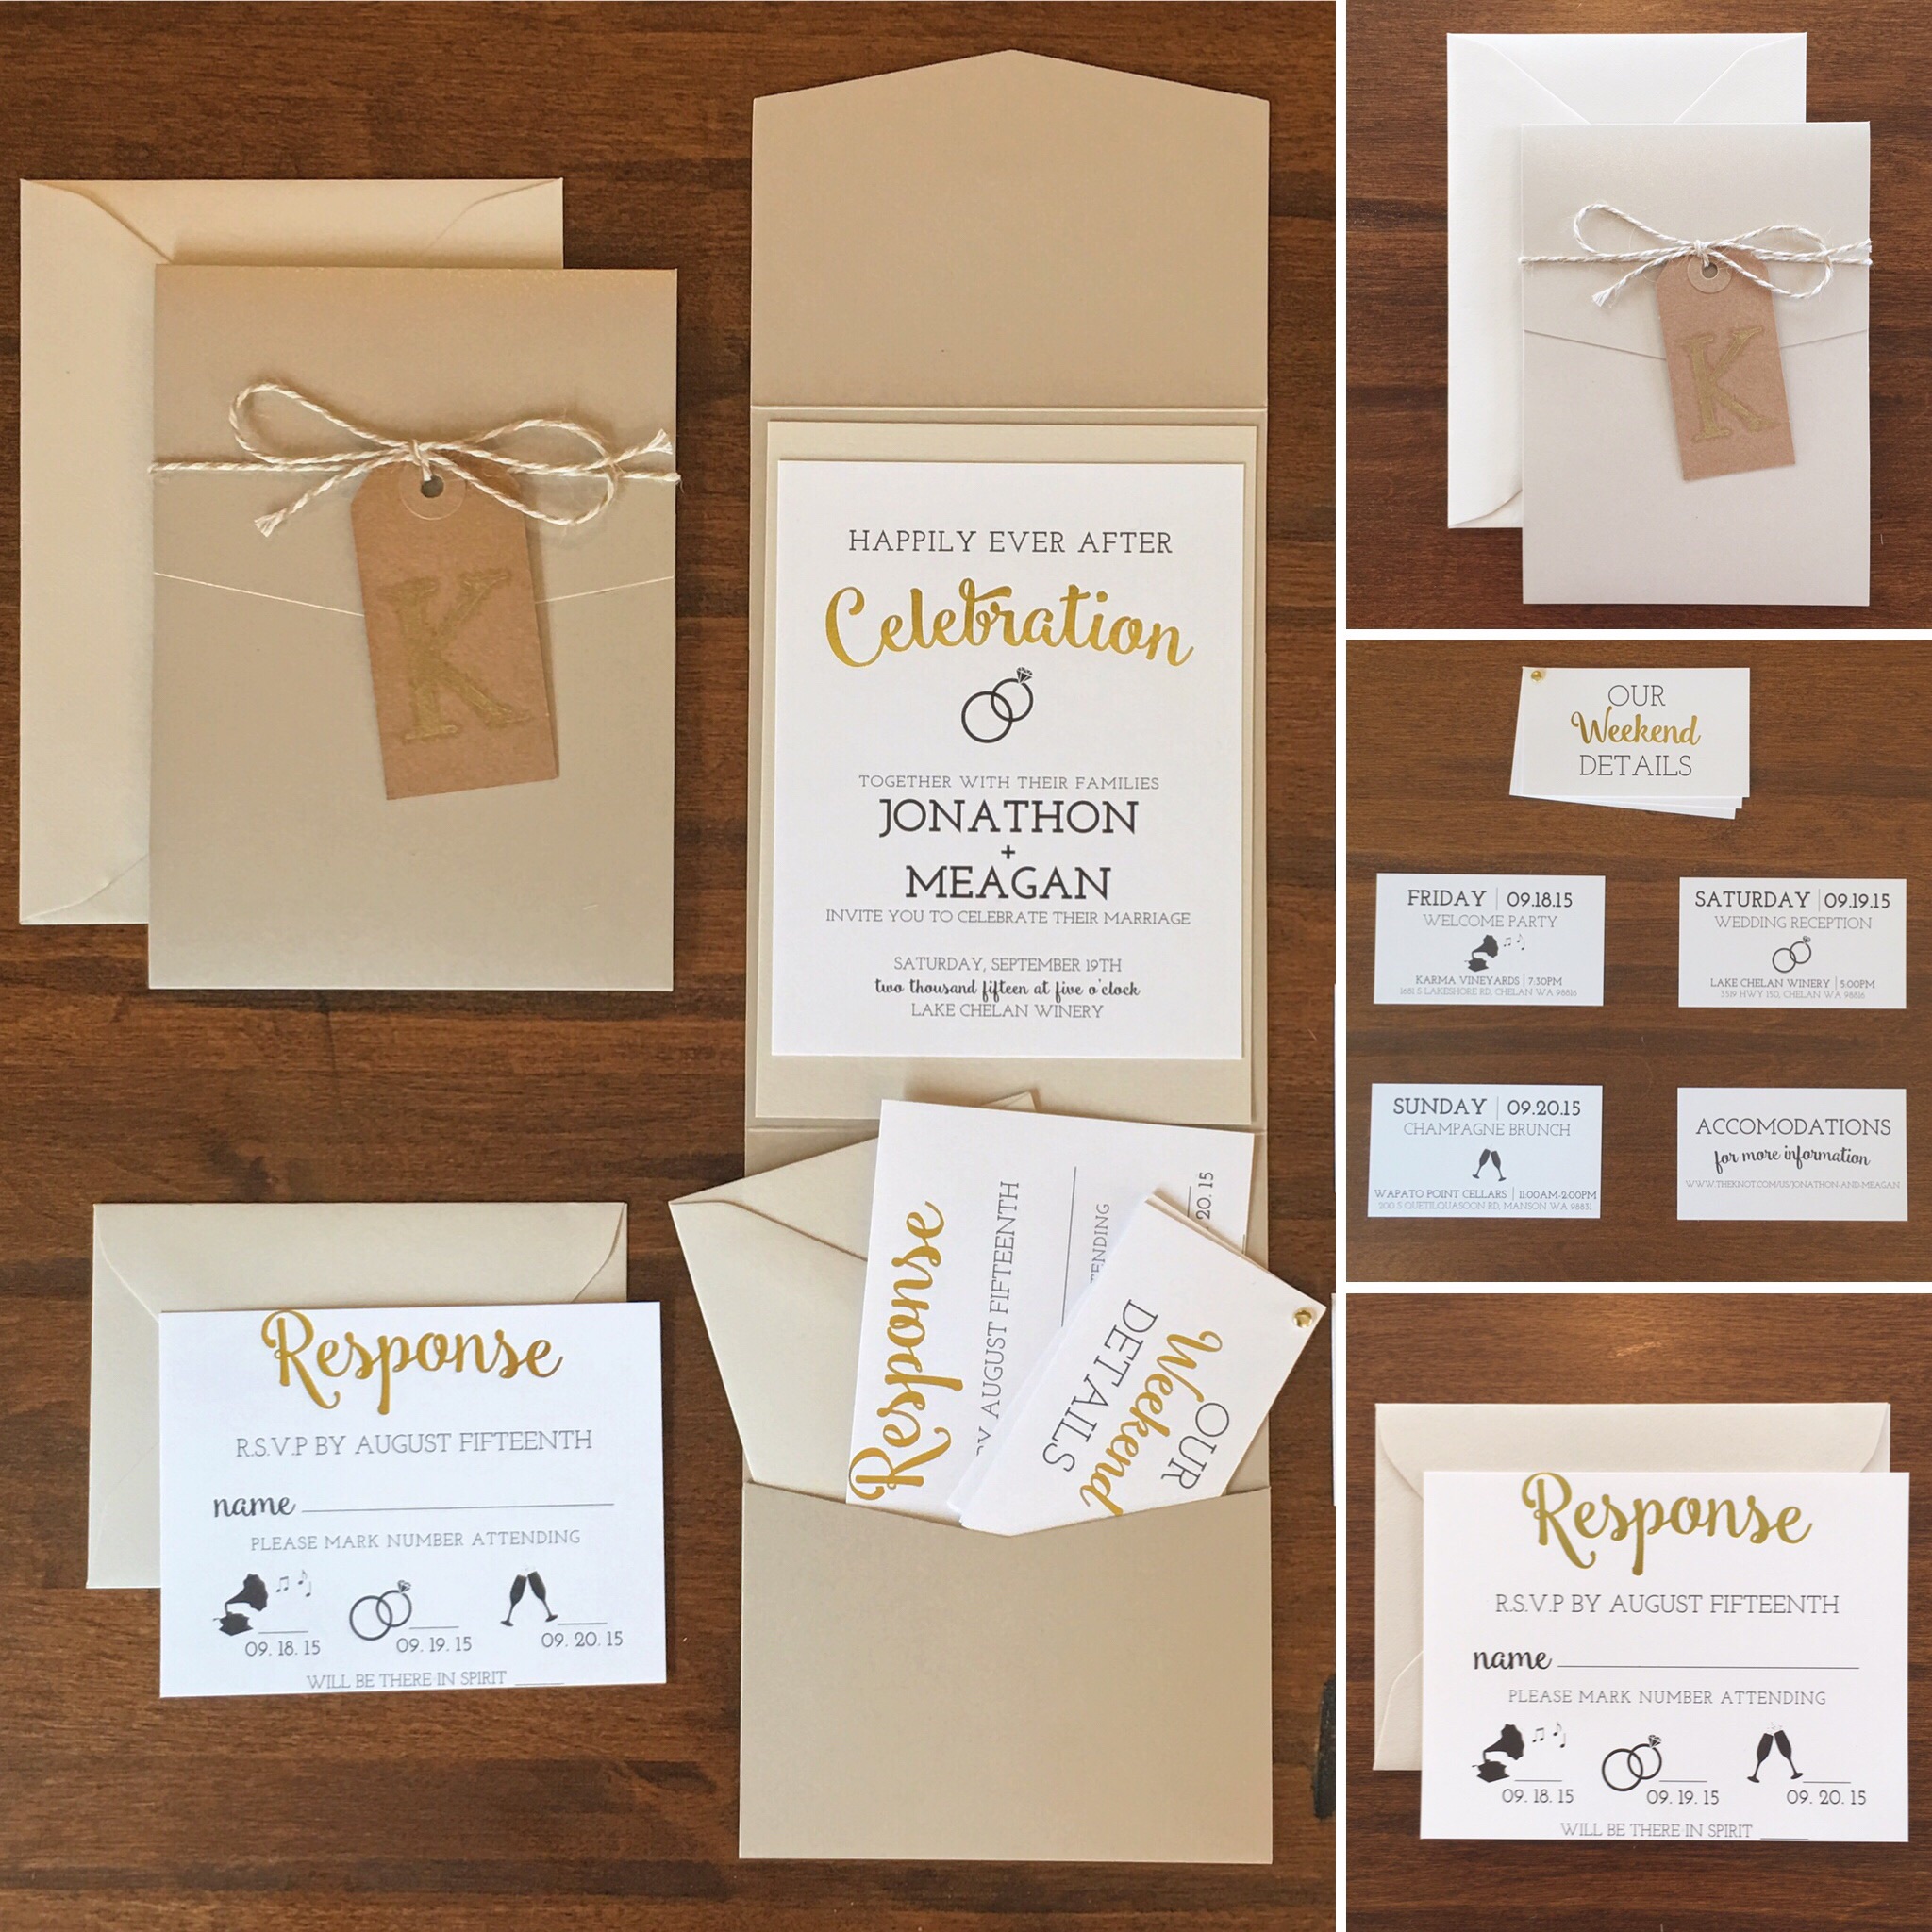
My wedding reception invitations included blood, sweat and tears. Literally.
I created my invitations start to finish.
First | I went to Pinterest. Of course. I compiled a long list of pins I liked. I then went through and decided what I liked about them. Then I paired them down to 5 key elements I wanted
- Colors, Gold and neutrals
- Pocket invitation card
- Flip card of events
- Fonts, one script and one simple
- Icons
Second | I ordered my pockets, envelopes and invitation card mat from cards and pockets. I sketched out my ideas for each piece, the main mat invitation, the response card, and the flip card of events. I then gave my sketches to my sister and she designed them on her computer.
Third | I researched a company that could print in gold foil. I found Kool Printing and sent them an email with my designs, paper sizes and timeline I needed them done by.
Fourth | I made a trip to Hobby Lobby and stocked up on all the items I would need to assemble my invitations.
- Double sided tape
- Gold eyelets
- Small hole punch
- Ribbon
- "K" stamp & gold ink
I received my prints and pockets in the mail and started to assemble!


The invitations ended up costing me $5.80 each.
If I were to do them again here are my tips.
- The invitations ended up weighing more than I had expected so I had to order a second round of stamps just to send them out which obviously not only cost me more but also delayed sending out the invitations.
- I would have double checked my paper sizes. My "Response" cards were just a shy too large for their envelopes so I had to take them in to get professionally cut down.